If you have ridden in a car, used your cellphone for directions or checked the weather on TV, chances are you’ve relied on Adcole technology.
Adcole designs and manufactures specialized machines to measure engine components such as camshafts, crankshafts and pistons. The company’s 60 year history traces back to the earliest days of the space age as some of the very first satellites featured Adcole Sun Sensors for navigation (a trend that continues to the present as GPS, weather and communication satellites as well as, numerous NASA spacecraft utilize Adcole’s sensors).
Recognizing a similar need for accurate inspection in the automotive market, Adcole developed high accuracy gages for precision measurement of camshafts and crankshafts and other cylindrical parts. Introduced in 1968, Adcole gages are now used in more than 550 automobile and supplier plants in over 30 countries to inspect millions of manufactured engine parts and qualify the machines that make them, such as grinders, milling and CNC machines.
Automotive Industries (AI) had the opportunity to interview J. Brooks Reece, President and CEO of Adcole Corporation, Steve Corrado, VP of Engineering and Will Smith, VP of Software Engineering.
AI: You recently exhibited at IMTS2016 and will be attending CIMTS in Beijing. What new products did you unveil?
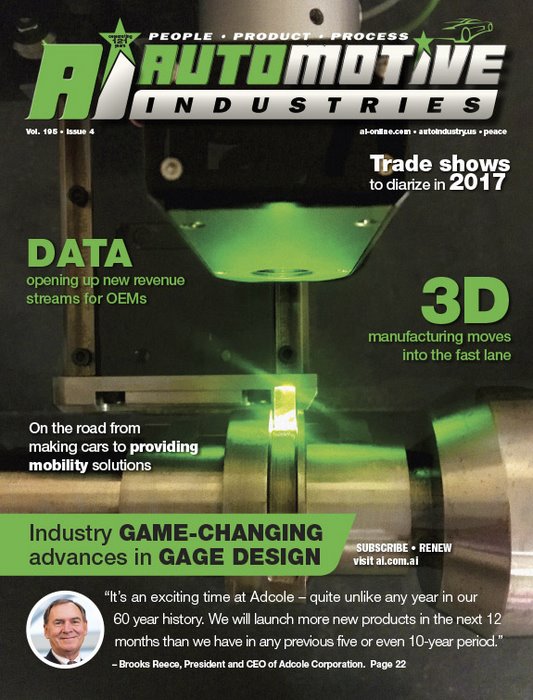
Reece: It’s an exciting time at Adcole – quite unlike any year in our 60 year history. We will launch more new products in the next 12 months than we have in any previous five or even 10-year period. IMTS featured the early introduction of the 1302 Gage for sliding camshafts and the 1000-Zygo, a surface measurement gage that employs both optical and tactile probes to detect imperfections not only on lobe and bearing surfaces but also in machined grooves, such as cam track bottoms and cam sidewalls.
In early 2017 we will add two more optical accessories to our metrology line: the LightScan for measuring crankshaft undercuts, pin widths, chamfers and oil holes, and the P3, a multi-axis triangulation sensor for ultra-high precision camshaft measurements. The P3 is especially useful for timing wheel and gear measurements.
At CIMTS we will unveil the new redesigned versions of our flagship 1200 and 1100 crankshaft gages. These gages have a new sleeker look, new measuring features, greater accuracy, and faster measuring cycles, while taking up 30% less floor space.
AI: How are you maintaining this pace?
Corrado: Our engineering team has grown considerably the last few years. New parts and new engine technologies are coming on-line, many of which require completely new measuring solutions. By developing our engineering corps we have been able to both innovate new technologies and rigorously test the new measuring capabilities we’ve produced. The second part – the testing aspect – is just as important as the first because Adcole customers have come to expect an exceptionally high standard of performance, accuracy, repeatability and reliability in our gages.
AI: What advances are being made in software?
Smith: The new gages and optical metrology products gave our software department the opportunity to rethink how an operator uses the machine on a day-to-day basis. As a result, our part programming software has been vastly improved. Even a novice operator can take a complex part and program new measuring sequences, inspection routines and create QA output reports with a few clicks. We also developed 3D Software for rapid defect visualization. An inspector can identify problems at a glance using the color-scaled 3D images produced by the measuring data.
AI: What are some of the major advances in the industrial metrology industry?
Reece: Combined systems – gages with both optical and tactile measuring capabilities – will reshape the industry. Previously you needed two different machines operated by two technicians to measure all of the necessary parameters. This can now be accomplished with just one inspection machine, the 1000-Zygo. That’s an industry game changer. There are certain types of measurements only tactile tools can provide, chatter being one of the more important ones. Conversely, there are some measurements better suited to optical probes, such as undercuts, boreholes, and other areas that are too tight or impossible to get at with a touch probe. I also think 3D part visualization, similar to what we have pioneered with our 3D camshaft and crankshaft mapping, will influence quality inspection programs to a large degree.
AI: What are some of the challenges facing automotive metrology systems?
Reece: Measuring tighter tolerances while keeping up with a high rate of production. Camshafts and crankshafts are held to incredible performance standards as engines need to deliver more horsepower with better fuel economy while lowering tailpipe emissions. In order to accomplish that, more parameters must be measured throughout the production process to assure these standards can be met. That’s the driving force behind Adcole’s high-speed in-line gages as well as end of line, high precision gages. Having a gage that offers sub-micron accuracy provides OEMs and component suppliers with a huge technical advantage.
AI: So these machines are a cost savings device?
Reece: Absolutely. Everyone’s goal is to produce the highest quality part possible and an Adcole inspection report is like having a receipt that shows how good the part you make really is. However, it’s not merely about QA and catching defects. It’s about reducing scraps and qualifying grinders and machining tools. There are gages out there that can’t tell the difference between a bad part and a little bit of dirt. Adcole’s error correction technology has saved customers hundreds of thousands – even millions.
AI: How did Adcole’s metrology systems become the world standard for accuracy, reliability, and durability for leading automotive manufacturers?
Reece: We have our customers to thank for that. The commitment to quality by our early users is why Adcole gages spread to plants all across the globe. It would have been easy for any of them to justify buying a cheaper, inferior measuring machine. However, they realized a quality advantage was in fact, a technical advantage thanks to the accuracy and stability of an Adcole.
AI: There is growing convergence between aerospace and automotive engineering. What are Adcole’s strengths in the aerospace sector?
Corrado: The two industries are after the same thing – eliminating the margin of error. Once a part is in space, you can’t get it back and any company that’s been on the wrong end of a recall will tell you it’s almost as much as a challenge to get those parts back. There are no second chances in these industries. It has to work the first time and continue to perform for a long time under a wide range of conditions.
Camshafts and crankshafts measured by our gages are in everything from high performance race engines to economical compact cars while our sun sensors are spread across the solar system, in Earth’s orbit aboard the International Space Station, on the surface of Mars aboard Rover, past Pluto on the New Horizons spacecraft and aboard nearly every Solar Observational spacecraft, including the Solar and Heliospheric Observatory (SOHO), Solar X-ray Imager (SXI), Solar Dynamics Observatory (SDO), SORCE, IRIS, STEREO, and TRACE.


More Stories
Is Your 70 Series Land Cruiser Underperforming? Here’s How to Unleash Its True Potential
What to Do After a Motorcycle Accident to Protect Yourself
Injured in a Motorcycle Crash? Talk to an Attorney Now